Easy Stovetop Honey Lemon Curd Recipe in 20 Minutes: Your New Zesty Obsession
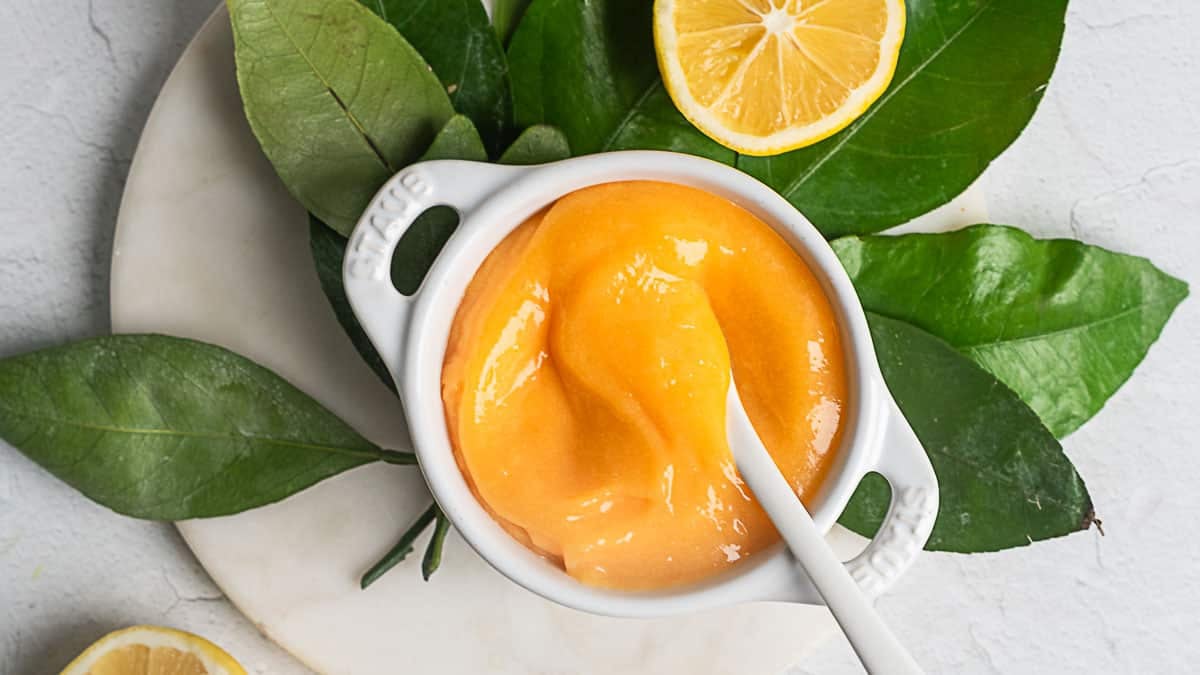
Imagine a spoonful of sunshine – that’s exactly what you get with a perfectly made honey lemon curd. Bright, tangy, and exquisitely sweet, this spread is a culinary delight that elevates everything from simple toast to elegant desserts. But what if we told you that creating this gourmet treat can be incredibly simple, fast, and achieved right on your stovetop in just about 20 minutes? Get ready to discover the magic of our easy
honey lemon curd recipe, naturally sweetened and destined to become your go-to whenever you crave a burst of citrusy joy.
As the seasons shift and vibrant colors begin to emerge in our surroundings, there's a natural pull towards fresh, lively flavors. This homemade honey lemon curd perfectly captures that essence. It's not just a recipe; it's an experience that transforms a handful of humble ingredients into a luxurious, gold liquid, making it a perfect moment for a seasonal treat. And with honey replacing traditional refined sugar, you're in for a flavor profile that's both deep and delightfully floral, setting this curd apart from the rest.
Why This Honey Lemon Curd Recipe Will Become Your New Favorite
This isn't just another lemon curd; it's *the* honey lemon curd you've been searching for. The secret lies in its natural sweetness and the surprisingly straightforward stovetop method. Unlike some recipes that call for double boilers or extensive chilling, our approach focuses on efficiency without compromising on quality or taste.
First and foremost, the use of honey instead of refined white sugar isn't merely a swap; it's an upgrade. Honey imbues the curd with a nuanced, floral depth that white sugar simply can't replicate. It adds a richness and a delicate sweetness that perfectly balances the tartness of the lemons, creating a complex flavor that's utterly addictive. It also contributes to a beautiful, deeper golden hue, making your finished curd as visually appealing as it is delicious. For a deeper dive into the natural sweetness, check out our article:
Honey Lemon Curd: Naturally Sweetened & Silky Smooth.
Beyond its superior flavor, this
easy honey lemon curd recipe is incredibly simple and fun to make. You'll witness a magical transformation on your stovetop as a seemingly lumpy mixture slowly smooths into a luxurious, gleaming liquid, thickening right before your eyes. It's a culinary spectacle that’s surprisingly satisfying, and even great to involve kids in watching the "magic" unfold. Plus, it’s a make-ahead champion! This luscious curd stores beautifully in the fridge for a week or can be frozen for several months, allowing you to savor its brightness long after the lemons are out of season.
The Secret to a Silky Smooth Curd: Key Ingredients Unveiled
While the process is quick, the quality of your ingredients plays a pivotal role in achieving that coveted silky, spoonable texture and vibrant flavor. This honey lemon curd typically calls for four core ingredients, each contributing significantly to the final masterpiece.
*
Lemons: The Zesty Heart
You'll be using both the juice and the zest, as the zest holds the majority of the lemon's fragrant oils and provides that intense, aromatic punch. While regular lemons work wonderfully, if you can get your hands on Meyer lemons, they are a game-changer. Meyer lemons are a hybrid fruit, slightly sweeter and less acidic than common lemons, with a wonderfully fragrant zest that beautifully complements the honey's floral notes. If Meyer lemons aren't available, don't fret! A mix of regular lemons and a clementine can mimic a similar delicate balance. Always ensure your lemons are fresh and organic if possible, as you'll be using the zest.
*
Eggs and Egg Yolks: The Velvety Thickener
Eggs and, specifically, extra egg yolks are what give the curd its velvety smooth, custard-like consistency. The yolks add richness and contribute to the curd's deep golden color. For the best results in both color and flavor, consider using pasture-raised eggs, which often boast richer yolks. The proteins in the eggs coagulate gently when heated, thickening the mixture to perfection.
*
Butter: The Luxurious Finish
Butter adds incredible richness and provides that signature silky finish that makes lemon curd so irresistible. While many recipes call for unsalted butter, a secret weapon for this particular recipe is *salted* butter. The delicate nudge of salt works wonders to balance the sweetness of the honey and the sourness of the lemons, creating a more harmonious and complex flavor profile. If you only have unsalted butter on hand, simply add a tiny pinch of sea salt to achieve a similar effect. For more insights on this and other ingredient secrets, read our article:
Elevate Your Curd: Meyer Lemons & Salted Butter Secrets.
*
Honey: The Natural Sweetener & Flavor Enhancer
As the star sweetener, honey not only provides natural sweetness but also deepens the flavor profile and enriches the color of your curd. While almost any smooth-flowing liquid honey will work, experiment with varieties like orange blossom honey for an extra layer of floral aroma that pairs exquisitely with lemons. It's crucial to use smooth, liquid honey rather than crystallized honey for the best consistency in your finished curd. If your honey has crystallized, a gentle warming in a bowl of warm water can bring it back to its liquid state.
*
The Strainer: Your Ally for Ultimate Silkiness
While some methods claim to skip it, for that truly professional, impeccably smooth texture, straining your finished curd through a fine-mesh sieve is highly recommended. This step removes any tiny bits of coagulated egg or zest particles, ensuring a luscious, unblemished finish that melts in your mouth.
Mastering the Stovetop Method in 20 Minutes
The beauty of this
easy stovetop honey lemon curd recipe lies in its simplicity and speed. The key is consistent stirring and moderate heat to prevent scorching and ensure even thickening.
1.
Combine Ingredients: In a medium saucepan, whisk together the lemon juice, lemon zest, honey, and eggs (whole eggs and extra yolks). Whisk vigorously until the mixture is well combined and slightly foamy.
2.
Gentle Heat: Place the saucepan over medium-low heat. This is crucial – you want a gentle, steady heat, not a roaring boil.
3.
Constant Stirring: Begin stirring continuously with a whisk or a rubber spatula. This constant motion is vital to prevent the eggs from scrambling and to ensure the curd thickens smoothly. Scrape the bottom and sides of the pan frequently.
4.
The Transformation: You’ll notice distinct phases. Initially, the mixture will be thin and watery. As it heats, it will start to look slightly lumpy or "curdled." Don't worry, this is normal! Keep stirring. Slowly, over about 10-15 minutes, the mixture will begin to smooth out and visibly thicken. It will coat the back of your spoon, and when you run your finger across the back of the spoon, it should leave a clear trail. The curd is ready when it reaches a temperature of around 170-175°F (77-79°C) – it will be thick enough to hold its shape but still pourable, just at the brink of boiling.
5.
Incorporate Butter: Remove the pan from the heat immediately. Add the cold, cubed butter (or salted butter) a few pieces at a time, whisking constantly until it's fully melted and incorporated. The butter adds a final layer of richness and emulsifies beautifully, giving the curd its signature sheen.
6.
Strain (Optional but Recommended): For the silkiest texture, immediately pour the hot curd through a fine-mesh sieve into a clean jar or bowl. Use a spatula to push it through. This removes any stray bits of zest or egg that may have cooked unevenly, guaranteeing a luxurious, smooth finish.
7.
Cool Down: Cover the surface of the curd directly with plastic wrap to prevent a skin from forming. Let it cool on the counter for a bit, then refrigerate for at least 2-3 hours, or until completely chilled and set. It will continue to thicken significantly as it cools.
Beyond the Basics: Storing and Serving Your Homemade Curd
Once you’ve mastered this incredible
honey lemon curd recipe, you'll want to enjoy it in countless ways. Luckily, it's also incredibly simple to store.
*
Storage: Transfer the chilled curd to airtight containers, such as glass jars. It will keep beautifully in the refrigerator for up to 1 week. For longer storage, you can freeze lemon curd for up to 3-4 months. Thaw it overnight in the refrigerator before using. Stir gently before serving after thawing.
*
Serving Suggestions: The versatility of homemade honey lemon curd is truly remarkable.
* **Breakfast & Brunch:** Slather it on warm biscuits, scones, croissants, or toasted sourdough bread. Stir it into homemade yogurt or use it as a topping for pancakes and waffles.
* **Desserts:** Use it as a filling for tarts, cakes, cupcakes, or crepes. Swirl it into cheesecake batter, use it as a topping for pavlova, or fill thumbprint cookies with its bright flavor.
* **Simple Pleasures:** A spoonful straight from the jar is often all you need! It also makes a fantastic topping for fresh berries.
Troubleshooting Tips:
*
Curdled Curd? If you notice bits of scrambled egg, it means your heat was too high or you didn't stir enough. Don't despair! You can still strain it aggressively through a fine-mesh sieve, or even try blending it with an immersion blender for a few seconds to smooth it out (though this isn't ideal).
*
Too Thin? If your curd isn't thickening, it might not have cooked long enough or reached the right temperature. You can return it to the stovetop over low heat and continue stirring until it reaches the desired consistency.
Conclusion
There's truly nothing quite like the bright, zesty, and utterly luxurious taste of homemade honey lemon curd. This
easy stovetop honey lemon curd recipe not only delivers incredible flavor but does so with remarkable speed and simplicity, making it accessible even for novice cooks. In just 20 minutes, you can create a vibrant, naturally sweetened spread that will elevate your breakfasts, brighten your desserts, and impress everyone who tastes it. So grab those lemons, your favorite honey, and get ready to whip up a batch of pure sunshine – your taste buds will thank you!